In the majority or Real World scenarios we will need to access
the Virtual Servers running within the Exalogic from an external
client network. To facilitate this we will want to leverage the
10Gb Ethernet connection and hence we will need to create 1 or
more EoIB networks that can be accessed by the Virtual Servers.
During the installation of the Exalogic 2.0.1 Virtual environment we create a single "EoIB-external-mgmt" network that we could, in theory, use to access the Virtual Servers we create. Although this is possible, assuming it has enough IP Address, this would be bad practice because this network is intended solely for management functionality and access to the Control VMs. Therefore to provide the Virtual Servers with external Ethernet access we will need to create additional EoIB interfaces. Each of these will need to be VLAN tagged to provide network isolation and partitioning.
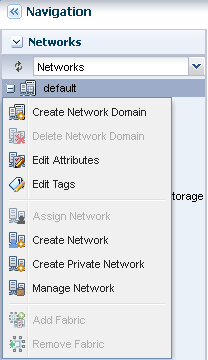 Having created our Enterprise Manager Ops Centre
(EMOC) users we will now have a Network Administrator account that
we will use for the next process. We will need to select the
Network Accordion and then either Right-Click on the default
network and Select "Manage Network" or select the default network
and choose the "Manage Network" Action.
Having created our Enterprise Manager Ops Centre
(EMOC) users we will now have a Network Administrator account that
we will use for the next process. We will need to select the
Network Accordion and then either Right-Click on the default
network and Select "Manage Network" or select the default network
and choose the "Manage Network" Action.
Once we have initiated the Manage Networks (this will create a new managed network) wizard it will allow us to specify all the external network information. It should be noted that all the networks that will be need should be created prior to the creation of the Virtual Server. This is because in the first release we are not able to add networks, easily, through EMOC once the Virtual Server has been created.
You will notice that as well as the name and description you are able to defined a number of Tags, name/value pairs, that can be used for searching within EMOC.
If we specify a Server Pool we will be taken to Step 7 and allowed to configure the interfaces.

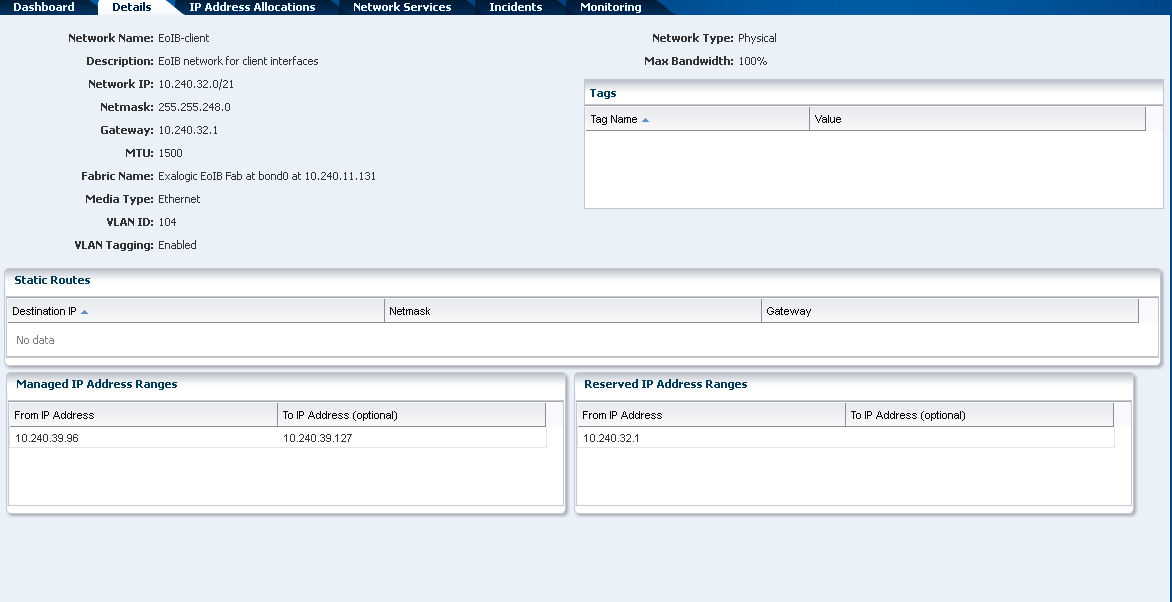
During the installation of the Exalogic 2.0.1 Virtual environment we create a single "EoIB-external-mgmt" network that we could, in theory, use to access the Virtual Servers we create. Although this is possible, assuming it has enough IP Address, this would be bad practice because this network is intended solely for management functionality and access to the Control VMs. Therefore to provide the Virtual Servers with external Ethernet access we will need to create additional EoIB interfaces. Each of these will need to be VLAN tagged to provide network isolation and partitioning.
Having created our Enterprise Manager Ops Centre
(EMOC) users we will now have a Network Administrator account that
we will use for the next process. We will need to select the
Network Accordion and then either Right-Click on the default
network and Select "Manage Network" or select the default network
and choose the "Manage Network" Action.Once we have initiated the Manage Networks (this will create a new managed network) wizard it will allow us to specify all the external network information. It should be noted that all the networks that will be need should be created prior to the creation of the Virtual Server. This is because in the first release we are not able to add networks, easily, through EMOC once the Virtual Server has been created.
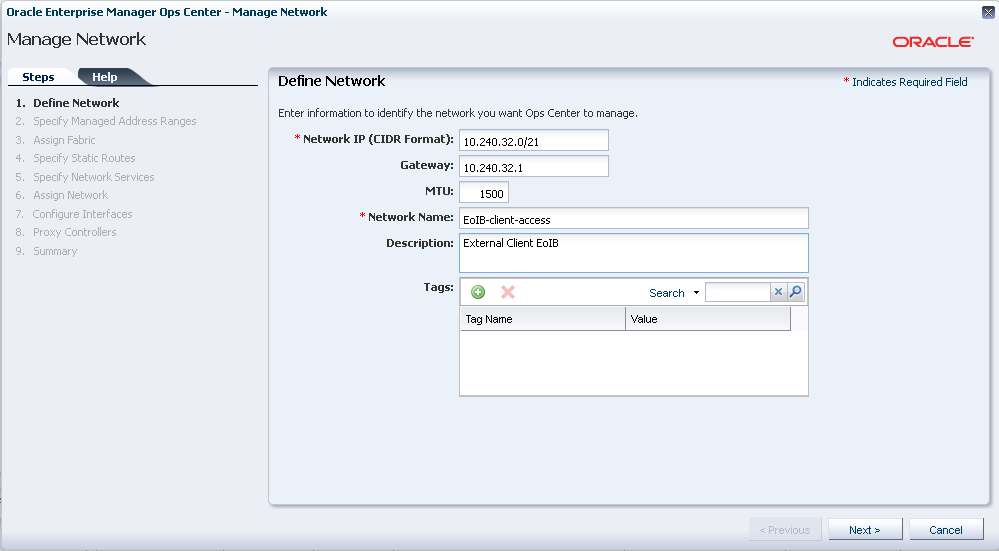
Define Network
In this Wizard Panel we will need to define the network information and IP range available for configuration later in the wizard. You will see that we specify the initial IP address in a CIDR format, I do not intend to explain CIDR, then the gateway and MTU to be used for this network.You will notice that as well as the name and description you are able to defined a number of Tags, name/value pairs, that can be used for searching within EMOC.
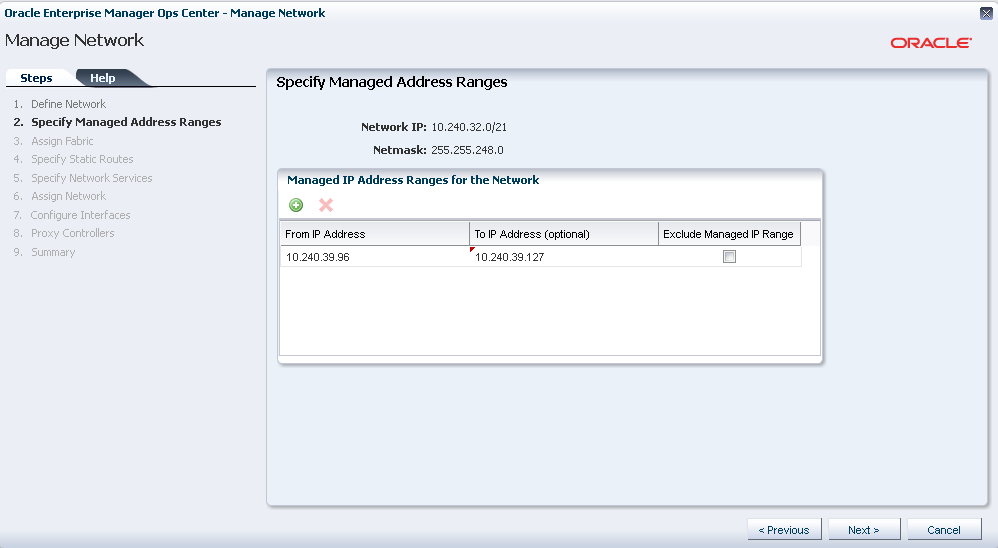
Specify Managed Ip Address Range
Here we define the IP addresses that are actually available within this network. You will notice that we can specify a number of ranges and hence you do not need to have large contiguous ranges. The only requirement is that they are permissible within the network range define in the first wizard panel.Assign Fabric
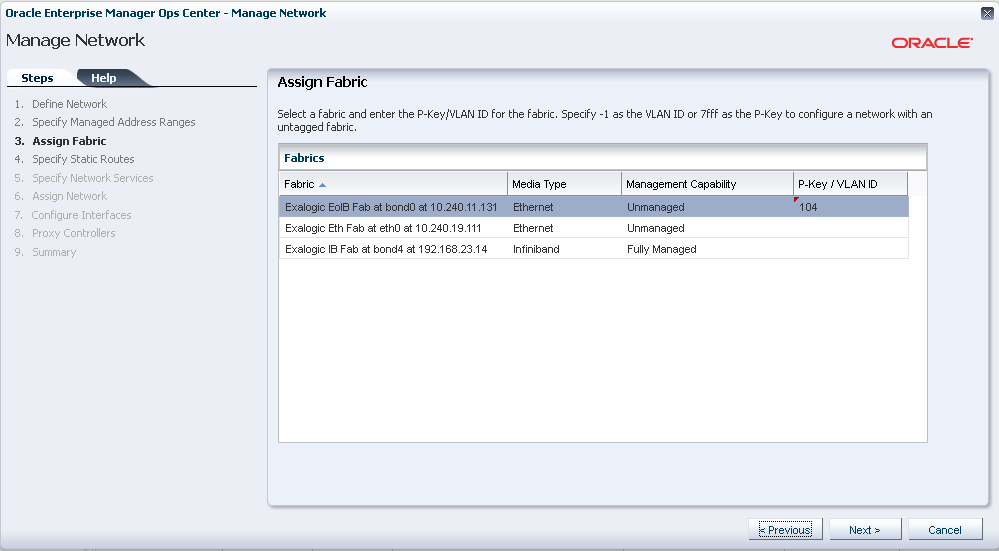
Once the IP addresses have been defined we will need to assign them to an existing Fabric and because we want to define EoIB we will use the existing EoIB fabric to allow us access to the external 10Gb network. As mentioned previously each of these networks must be VLAN tagged to allow the correct partitioning and routing across the fabric. So having selected the appropriate fabric we will need to enter the VLAN Id. We do not need to enter a Partition Key because EMOC will generate us a unique P-Key as part of the network creation process.Static Routes
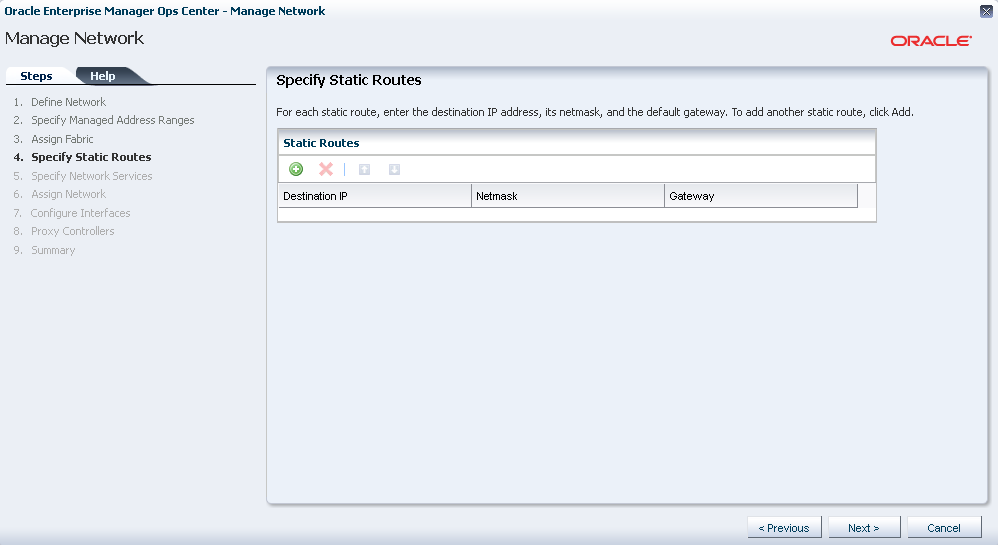
If you need to define any static routing information for this network range we can do this in the next wizard panel and this will be automatically added to the appropriate tables. Within my example this is not the case.Network Services
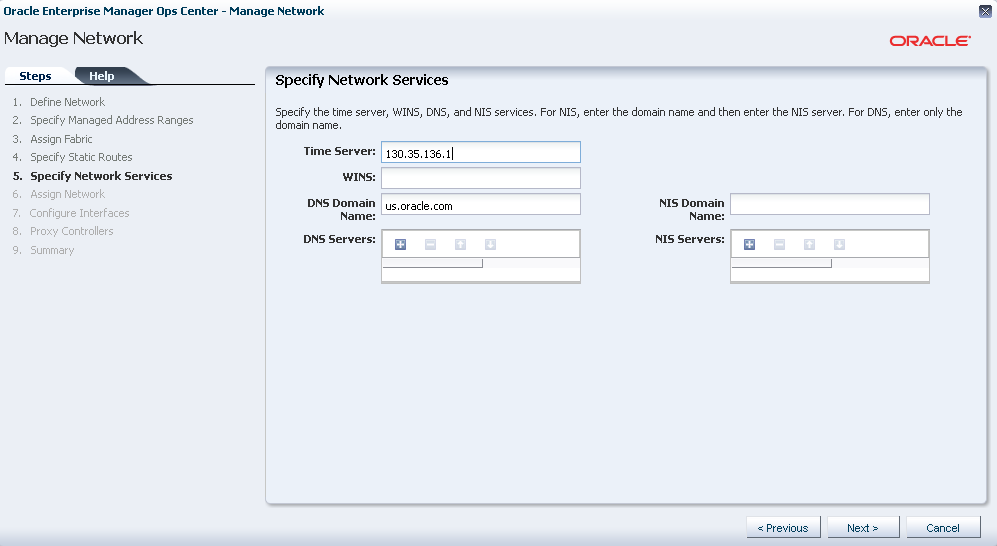
We no specify additional information, such as the NTP server and Domain name. These are all optional fields and, as such, can be left blank.Assign Network
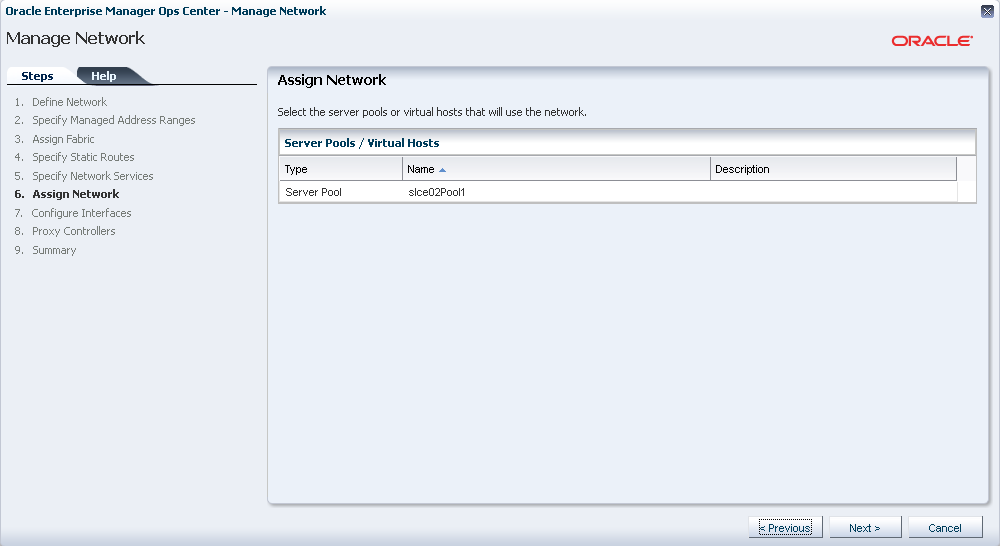
At this point we can assign the new network to a specific server pool(s) within the rack or if we do not select a pool the whole rack. Thus we can restricted the network access to specific parts of the rack.If we specify a Server Pool we will be taken to Step 7 and allowed to configure the interfaces.
Proxy Controls
At this point we can also specify if the network is to be manage / associated with one of the Proxy Controllers. This is not a requirement and in general we can leave this network free from association with any of the controllers.Summary
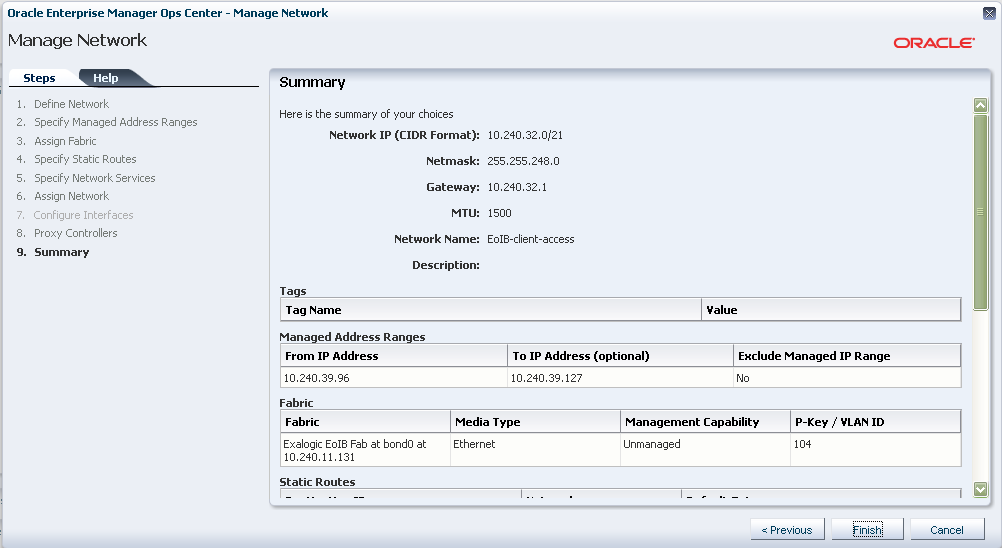
The Summary panel displays all information entered, for review, and once Finish is selected a Job will be created to create the network which will then appear in the list of available networks.
How do i confirm the network was created and what vServers can attach or will be attached to it. do i have to create vnics? I performed this task using EECS2.0.6
ReplyDelete